Peanut Butter Protein Bars Recipe

cost-effective dairy-free dietary adaptations FAQ Gluten-Free high protein Homemade no-bake Nutritious peanut butter protein bars protein powder Recipe Snack storage vegan

Posted October 6, 2023 by: Admin #Kitchen

Crafted using just six ingredients, these no-bake homemade peanut butter protein bars are an ideal choice for a high-protein snack. Prepare them today and savor a delectable, protein-packed treat all week long.

Advertisement:

In the realm of protein bars, not all are created equal in terms of nutrition or protein content. Paradoxically, numerous protein bars that tout themselves as “high in protein” actually contain as much, if not more, sugar than protein. This is precisely why crafting your own protein bars at home is a fantastic option.

Homemade peanut butter protein bars with a dark chocolate drizzle on parchment paper.

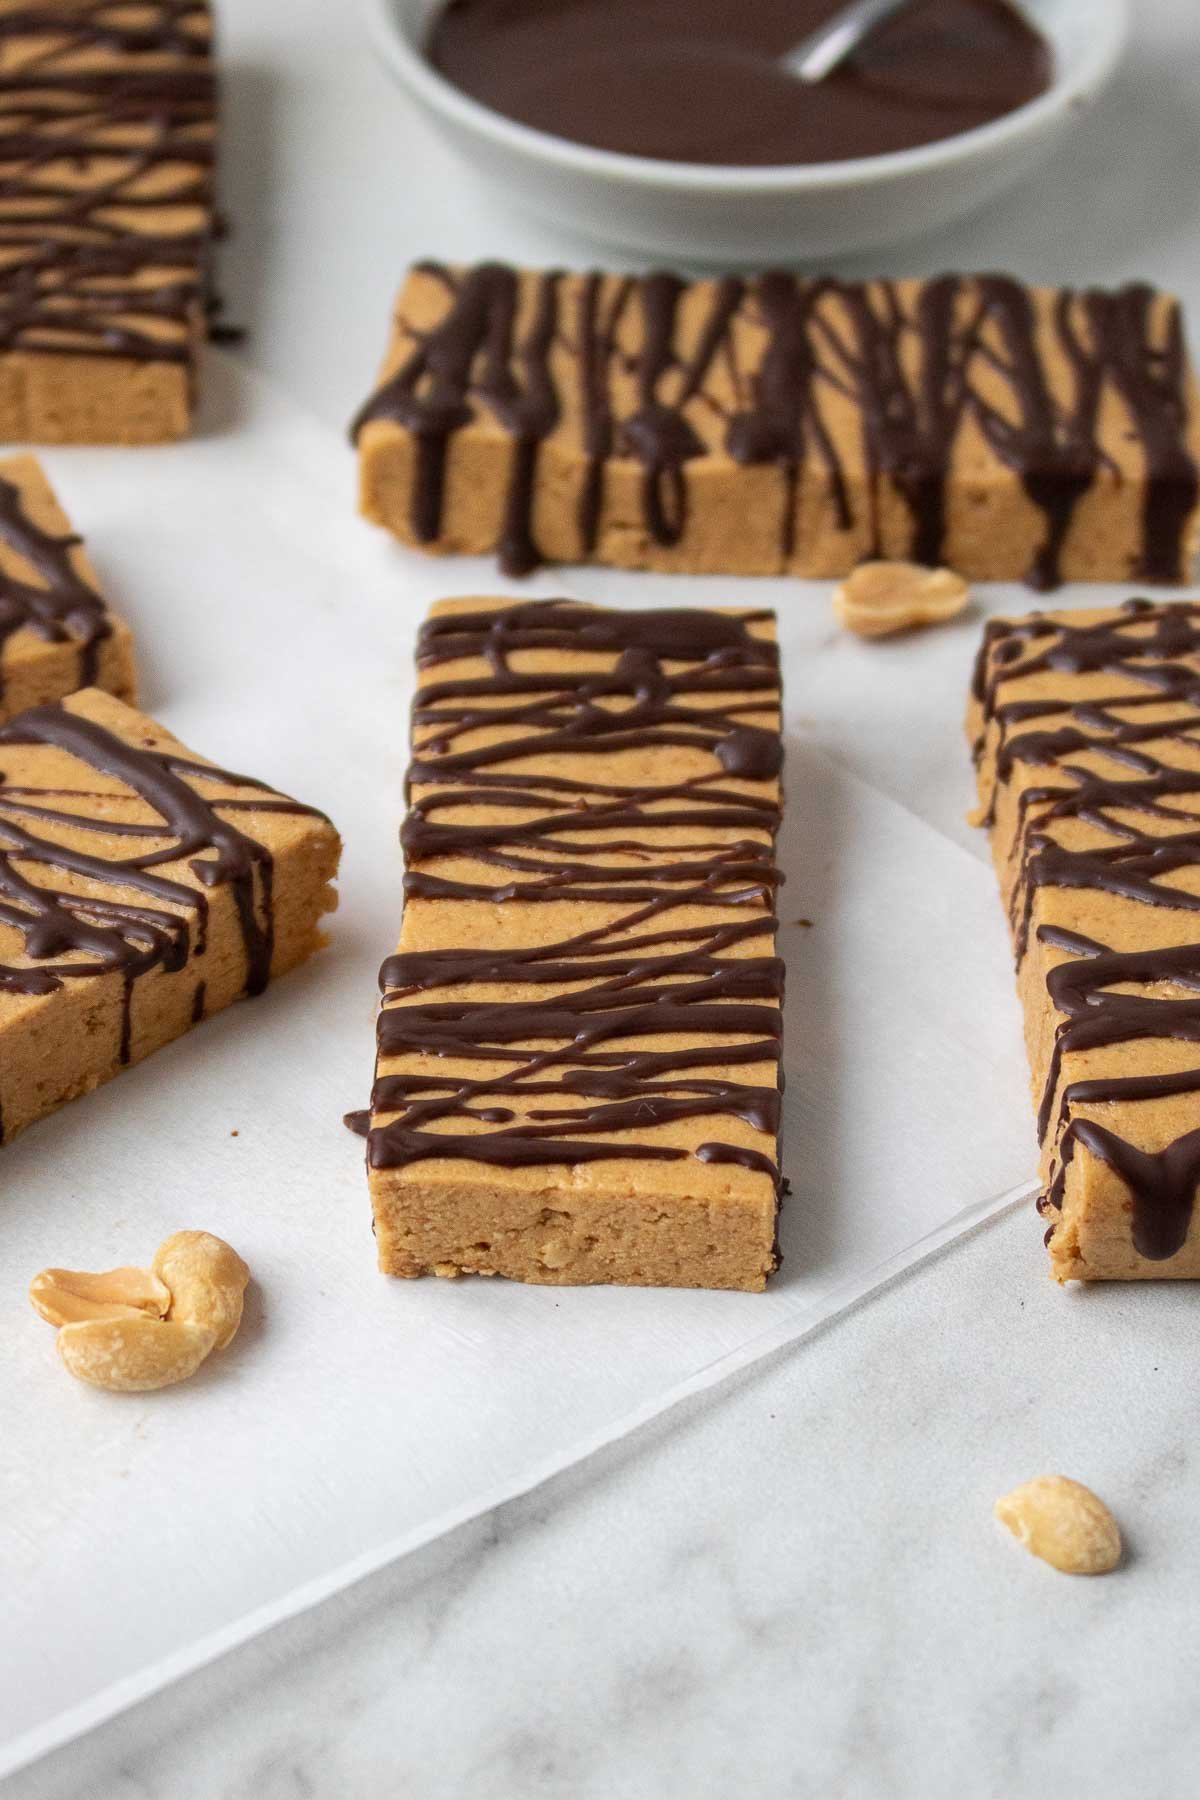
By concocting your own protein bars, you not only have complete control over the protein, calorie, and macronutrient content, but it also proves to be a more economical choice. These chocolate peanut butter protein bars deliver higher protein content per serving at a lower cost than their store-bought counterparts, and they’re a breeze to prepare!

Slide peanut butter protein bars with melted dark chocolate and peanuts

Advertisement:

Advantages of Crafting Your Own Protein Bars

  • Effortless and Swift: These no-bake protein bars can be prepared in a single bowl and are ready in under 30 minutes.
  • Cost-Effective: Homemade protein bars prove more budget-friendly on a per-serving basis compared to pre-made options.
  • Enhanced Quality: Taking charge of your ingredients allows for better quality control.
  • Reduced Sugar: You can manage the sugar content or opt for a sugar-free version if preferred.
  • No Unnecessary Fillers: Homemade protein bars are free from preservatives, additives, and extraneous additives.

Ingredients for protein bars: creamy natural peanut butter, vanilla protein powder, oat flour, honey, and dark chocolate chips.

Ingredients for Homemade Peanut Butter Protein Bars

To whip up these peanut butter protein bars, gather the following ingredients:

Advertisement:
  • Peanut Butter: Opt for all-natural creamy peanut butter, as conventional varieties may result in crumbly bars.
  • Protein Powder: Choose unflavored or vanilla-flavored protein powder. Whey protein powder is recommended, but plant-based options work as well. If uncertain, learn how to select the ideal protein powder for your objectives.
  • Oat Flour: This helps bind the mixture, improve texture, and create a dough-like consistency.
  • Honey: For sweetness and cohesiveness. Alternatives like maple syrup, agave, or brown rice syrup are viable if honey isn’t your preference.
  • Sea Salt: To season the bars and balance flavors.
  • Chocolate: Incorporate dark chocolate chips or chopped dark chocolate for a delightful drizzle on top of the bars. If you crave extra chocolate, consider adding mini chocolate chips to the protein bars themselves.

These peanut butter protein bars boast a texture reminiscent of Quest Bars or Perfect Bars, with the delightful flavor of peanut butter cookie dough.

Dietary Variations

For dietary adjustments, consider the following:

  • Gluten-Free: Use gluten-free protein powder and certified gluten-free oats.
  • Dairy-Free: Opt for egg white protein powder or plant-based protein powder.
  • Peanut-Free: Substitute peanut butter with almond butter or cashew butter.
  • Vegan: Utilize plant-based protein powder and replace honey with maple syrup.

Protein bar ingredients in a white mixing bowl

Advertisement:

Mixed batter for homemade peanut butter protein bars in a white bowl

How to Craft Homemade Protein Bars

Creating protein bars at home is remarkably simple. Here’s the step-by-step process:

  • Mix the Ingredients: Begin by blending peanut butter, protein powder, oat flour, honey, and salt in a large bowl until they form a sticky mixture.
  • Fill a Baking Pan: Transfer the mixture to a parchment paper-lined baking pan, pressing it down firmly until it’s even and smooth.
  • Chill: Place the baking pan in the refrigerator to allow the bars to set and solidify.
  • Slice into Bars: After chilling, cut the mixture into bars.
  • Chocolate Drizzle: Drizzle melted chocolate over the top of the bars, then return them to the fridge until the chocolate hardens.
  • Indulge and Enjoy!

Detailed instructions can be found in the recipe card below.

Homemade protein bars pressed into a baking pan.

Advertisement:

Nutrition Insight

Consuming a high-protein snack post-workout or between meals can enhance satiety levels, curb cravings, support muscle development and recovery, and aid in meeting your protein intake goals. The recommended daily protein intake varies by individual and objectives, but incorporating high-protein snacks is a great way to support your overall protein consumption.

Optional Extras

While this peanut butter protein bar recipe is designed for simplicity, you can customize it to your liking. Some optional additions include:

  • Mini chocolate chips
  • Chopped peanuts
  • Chopped almonds
  • Shredded coconut
  • Seeds like pumpkin seeds, sunflower seeds, chia seeds, or flax seeds
  • Dried fruits such as raisins, dried cranberries, or chopped dates
  • Vanilla extract

Protein bars on a baking rack with chocolate drizzled on top.

Advertisement:

Choosing the Right Protein Powder

For optimal results, opt for unflavored or vanilla whey protein powder. Peanut butter protein powder and chocolate protein powder are suitable alternatives. While plant-based protein powders can be used, they may result in a slightly gritty texture and less smooth integration with the peanut butter. If opting for a plant-based option, consider a blend containing all essential amino acids, as opposed to brown rice protein powder, pea protein powder, or hemp protein powder.

Frequently Asked Questions

Is It More Cost-Effective to Buy or Make Protein Bars?

Homemade protein bars are significantly less expensive than store-bought counterparts. Store-bought protein bars can range from $2 to $5 each, while crafting them at home costs less than $1 per bar.

Are Protein Bars Healthy?

Protein bars serve as convenient and nutritious high-protein snacks. Their healthfulness depends on their ingredients. Crafting homemade protein bars allows for better ingredient control and quality.

What’s the Typical Protein Content in a Protein Bar?

Protein bars contain anywhere from 5 to 20 grams of protein per bar. A high-quality protein bar should provide at least 10 grams of protein per bar.

Advertisement:

Storage

For storage:

  • To Store: Place the sliced bars in an airtight container and refrigerate for up to 5 days. Avoid prolonged room temperature storage.
  • To Freeze: Transfer the bars to an airtight container and freeze for up to 3 months. Thaw the bars before consumption.

Peanut Butter Protein Bars

These homemade chocolate peanut butter protein bars are quick and easy to prepare and can be stored in the fridge or freezer for lasting enjoyment of high-protein snacks.

Ingredients

  • 1 ½ cups creamy natural peanut butter
  • 1 ¼ cup vanilla protein powder, or unflavored
  • ¼ cup oat flour*
  • ¼ cup honey
  • ½ teaspoon sea salt
  • ¼ cup dark chocolate chips
  • 1 teaspoon coconut oil

Instructions

  • Line an 8×8-inch baking pan with parchment paper.
  • In a large bowl, add the peanut butter, protein powder, oat flour (see note below), honey, and sea salt, and mix, using a spatula or your hands, until well combined and a sticky batter forms. The mixture may still be a little crumbly, but be sticky enough that it holds together when pressed together with your hand. If your mixture is too dry, add a couple more spoonfuls of peanut butter and/or honey until it begins to hold.
  • Transfer the peanut butter mixture to the baking pan, spreading it out evenly, and pressing it into the bottom of the dish with your hands and/or a silicone spatula. Continue pressing it until the top of the peanut butter mixture is firm, smooth, and a little glossy.
  • Once pressed into the dish, transfer the baking pan to the fridge for 30 minutes to set and firm up.
  • Once complete, remove the baking pan from the fridge and, using the parchment paper, remove the mixture from the baking pan and transfer it to a cutting board. Using a large, sharp knife, slice the mixture into 10 evenly shaped bars.
  • In a small microwave-safe bowl, add the chocolate chips and coconut oil and then warm in the microwave in 30-second increments, stirring in between, until melted and smooth, and then drizzle the top of each bar with melted chocolate.
  • Transfer the bars back to the fridge, directly on the cutting board, for 10 minutes or until the chocolate has solidified.
  • The bars can be enjoyed immediately or stored in an airtight container in the fridge for up to 5 days.

Notes

Oat Flour: If you don’t have oat flour, you can make your own by grinding 1/4 cup of rolled oats in a food processor until a fine flour-like texture forms.

Advertisement:

Peanut Butter: Be sure to use all-natural, creamy peanut butter. Conventional peanut butter, such as Skippy, Jif, or Kraft, won’t work as well and will leave you with crumbly bars.

Protein Powder: I recommend using whey protein isolate powder for the best results, as it blends into the peanut butter more easily and creates a smoother texture. Although plant-based protein powder will work, it may create a slightly grittier and crumblier texture.

Nutrition

  • Serving Size: 1 bar
  • Calories: 318 calories
  • Sugar: 10 grams
  • Fat: 20 grams
  • Carbohydrates: 19 grams
  • Protein: 20 grams

Thanks for your SHARES!

Advertisement:

You May Also Like

Add a comment

Latest posts

Jamie Oliver’s Creamy Mediterranean Vanilla Cheesecake: A Dreamy, Impressive Dessert That’s Dead Easy to Make

baking with honey basic roll cake delicious dessert recipe easy baking recipe homemade cake recipe honey Swiss roll moist Swiss roll soft sheet cake Swiss roll cake

Delicious Homemade Swiss Roll Cake Recipe with Honey – Easy and Moist!

Appetizer Awesome Blossom Dipping Sauce Crispy Onion Rings Dipping sauce Homemade Appetizers Homemade Onion Rings Make-Ahead Onion Rings. Onion Ring Recipe Onion Ring Serving Ideas restaurant-style side dish

Crispy Onion Rings with Dipping Sauce

butternut squash soup Common Questions. cutting butternut squash easy variations fall recipes ingredients make-ahead Perfect roasted butternut squash roasted vegetables roasting method selecting and storing butternut squash simple roasted butternut squash recipe tips Tutorial ways to serve

Roasted Butternut Squash Recipe

Active Dry Yeast Bread Flour Cloverleaf Rolls Dinner Rolls holiday make-ahead Milk Bread Recipe tips

The Softest Cloverleaf Dinner Rolls

Balsamic Vinegar Basil Burrata Cheese Caprese Salad Heirloom Tomatoes olive oil Recipe Summer Salad Tomato Burrata Salad

Tomato Burrata Salad Recipe

5-Seed Bread Artisan Bread Bread Flour Bread Making Bread Recipe Crusty Loaf Dutch Oven Baking Dutch Oven Bread easy baking Homemade Bread No-Knead Bread Sandwich Recipes Toasted Seeds

Easy Dutch Oven Bread Recipe

baking soda buttermilk Common Questions. easy recipe freezing holiday favorite. Irish Soda Bread no kneading quick bread raisins recipe instructions tips

Irish Soda Bread Recipe

Appetizer Bacon Ranch Cheese Ball Bagels Crackers Creamy Crostini Easy Holidays Homemade make-ahead olives party Pita chips pretzels Recipe Roasted Peppers Salami serving ideas storage tips Tortilla Chips Valentina’s Corner Vegetables

Easy Classic Cheese Ball Recipe

Avocado Corn Salad BBQ boiled corn boiling time cooking method Corn Chowder Corn Guacamole corn on the cob corn recipe culinary delight juicy leftover corn peak season Pro serving tip Sugar summer side dish sweet corn tender wooden skewers

Boiled Corn on the Cob Recipe