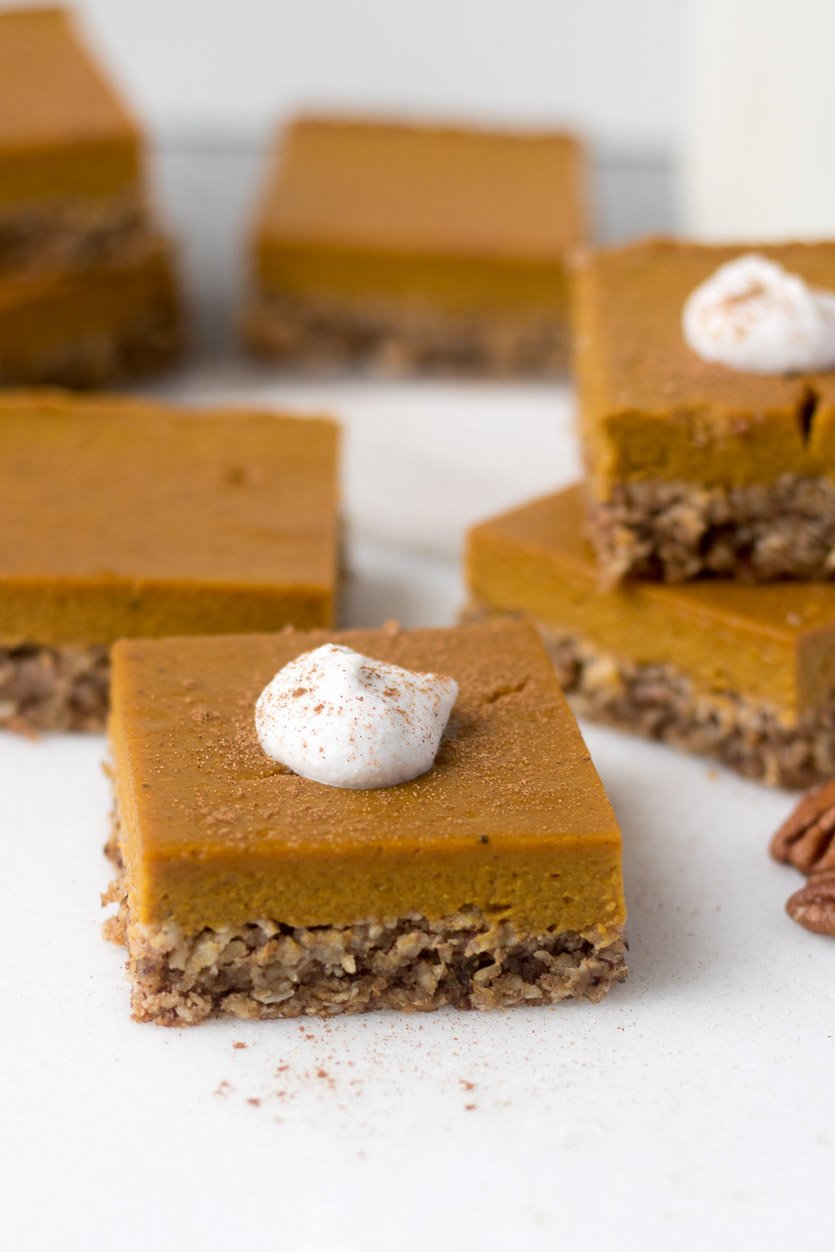
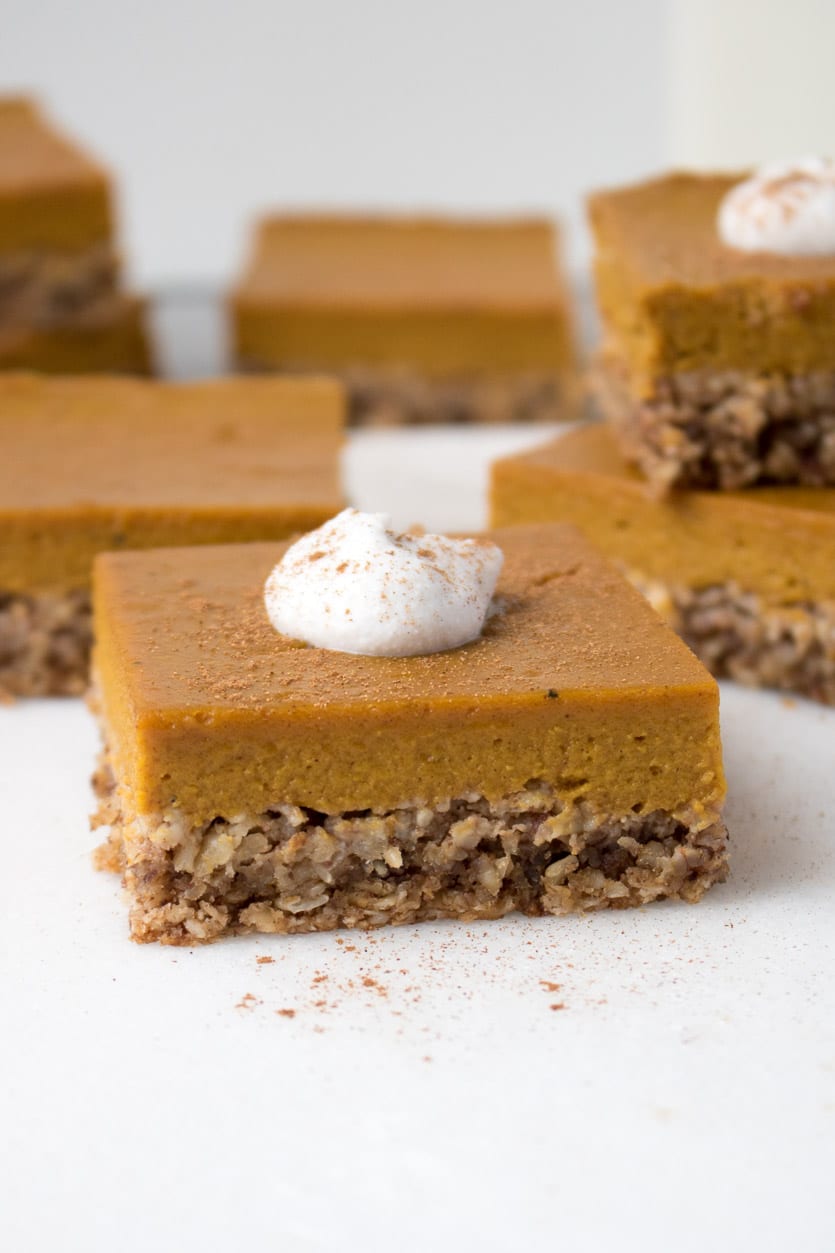
Crafted with a crumbly pecan and oat crust, homemade pumpkin pie spice, and pure maple syrup, these delectable pumpkin pie bars offer a taste of autumn. What’s more, they’re naturally gluten-free, dairy-free, and vegetarian, ensuring a delightful treat for everyone!
The taste of pumpkin can be divisive; you either adore it or detest it with no middle ground. Personally, I’m a fervent fan of pumpkin and enjoy incorporating it into both savory and sweet dishes, such as soups, pancakes, oatmeal, cookies, and chia puddings. Yet, nothing quite compares to the timeless allure of pumpkin pie. So, I’ve decided to transform my favorite dessert into a wholesome, handheld delight – because, why not?
Ingredients for Wholesome Pumpkin Pie Bars
Crafted from ingredients reminiscent of a traditional pumpkin pie, here’s what you’ll need to create these gluten-free pumpkin pie bars:
- Pumpkin Puree: The cornerstone of this recipe. While I used canned pumpkin puree, you can certainly make your own if you prefer. Please note: Canned pumpkin puree is NOT the same as pumpkin pie filling. Pumpkin puree is composed of cooked and pureed winter pumpkin (or squash), whereas pumpkin pie filling includes added spices.
- Spices: A blend of cinnamon, ginger, nutmeg, cardamom, and cloves enables you to create a homemade pumpkin pie spice mix to flavor the bars. You can even prepare extra and store it for other pumpkin-flavored recipes.
- Rolled Oats: Opting for rolled oats instead of a traditional pie crust boosts the fiber content and renders the bars gluten-free. By processing rolled oats in a food processor, you can easily create oat flour to form the crust. Plus, the oat crust boasts the delightful flavor of an oatmeal cookie, making it an irresistible choice.
- Pecans: Adding a dose of healthy fats, flavor, and crunch to the oat crust.
- Coconut Oil: To introduce more healthy fats. While I utilized coconut oil in this recipe to maintain its dairy-free nature and ensure it’s suitable for all, you can substitute unsalted butter if you prefer.
- Coconut Milk: The addition of full-fat coconut milk maintains the dairy-free character of the bars. If you’re not a fan of coconut milk, whole milk or half-and-half can serve as alternatives.
- Eggs: Essential for binding the bars together.
- Vanilla Extract: Elevating the sweetness factor.
- Maple Syrup: A natural sweetener that accentuates the fall flavors.
A classic pumpkin pie recipe typically involves copious amounts of added sugar, but I’ve chosen to utilize maple syrup to provide just the right level of sweetness. Additionally, I’ve incorporated an array of spices to enhance the flavor and capture the essence of pumpkin pie.
How to Craft Gluten-Free Pumpkin Pie Bars
- Create oat flour: Utilize a food processor to finely grind the rolled oats, transforming them into oat flour. Don’t forget to also incorporate the chopped pecans.
- Construct the crust: In a spacious bowl, combine the oat mixture with the spices, coconut oil, vanilla extract, and maple syrup. Stir until a crumbly texture takes shape, and then press this oat crust into the base of a lined baking pan.
- Bake the crust: Pre-bake the oat crust in the oven until it turns golden brown, ensuring it’s firm and doesn’t become soggy when combined with the pumpkin pie filling.
- Prepare the pumpkin filling: While the crust bakes, mix the pumpkin puree, pumpkin pie spice, salt, eggs, vanilla, coconut milk, and maple syrup together until well blended.
- Bake the bars: Once the crust has been pre-baked, layer it with the pumpkin filling and return the bars to the oven for complete baking.
- Allow to cool: After baking, remove the bars from the oven and let them cool slightly. Patience is key; cutting the bars too early may compromise the texture of the filling.
- Slice and serve! Once fully cooled, slice the bars into uniform squares and enjoy them on their own, with a dollop of whipped cream, and/or a sprinkle of cinnamon.
These bars are a versatile delight, suitable for dessert, snacks, or even a wholesome breakfast. You can even top them with a generous dollop of Greek yogurt to boost their protein content, creating a well-balanced, nutritious, and scrumptious meal.
Variations
For Gluten-Free Bars: Although the recipe is inherently gluten-free, make sure to use certified gluten-free oats to guarantee the bars are truly gluten-free. Some oats can potentially become cross-contaminated during processing and packaging.
For Vegan Bars: Omit the eggs and substitute them with 2 “flax eggs” instead. To create one flax egg, combine 1 tablespoon of ground flaxseed meal with 3 tablespoons of water and allow it to thicken for 5 minutes (you’ll need to make 2), then incorporate this mixture into the recipe, following the same instructions as for eggs.
Not a fan of coconut oil? You can swap it out for an equal amount of butter, ensuring it’s unsalted.
Not fond of coconut milk? You have the option to replace it with whole milk or even use half-and-half if you desire an extra rich and indulgent experience.
Storage & Thawing
For Storage: Place the cooled bars in an airtight container and store them in the refrigerator for up to 5 days.
For Freezing: Once baked and cooled, either cover the bars in the pan with plastic wrap or slice them, remove them from the pan, and transfer them to an airtight container, separating the layers with parchment paper. Freeze them for up to one month. Although they won’t spoil if stored longer, their taste and texture may start to deteriorate.
For Thawing: Retrieve the bars from the freezer and allow them to thaw in the fridge overnight or for at least 12 hours. Avoid using the microwave or oven for thawing.
Believe me, if you’re a pumpkin pie enthusiast, you’re bound to adore these pumpkin pie bars! They make an excellent dessert choice for a gathering and offer a simple and wholesome indulgence for afternoon snacks throughout the week. Pair them with a warm cup of coffee or tea for the perfect combination.