Crafting Cold-Processed Lard Soap from Scratch

cold-processed lard method essential oils exfoliants homemade soap self-sustainable soapmaking

Posted October 24, 2023 by: Admin #Kitchen

Amidst the hustle and bustle of our daily lives, we often overlook the humble yet essential item – soap. It’s time to break free from store-bought options and explore the world of homemade soap.

Advertisement:

Not only can high-quality soaps be expensive, but there may also be occasions when store shelves are bare. Fear not! In this guide, we will learn how to create a basic yet effective soap using a cold-processed lard method. With just a few ingredients and simple steps, you can make your own soap that is cost-effective, customizable, and always available. Let’s dive into the art of soapmaking and discover the joy of crafting your very own bars from scratch.

Ingredients:

  • 1000g lard (preferably homemade)
  • 266g water (distilled or boiled)
  • 133g lye (store-bought or homemade from wood ash)
  • 30g essential oils (optional)

Instructions:

  1. Prepare the lye solution:
    1. Add water into a glass jug.
    2. In a separate container, carefully measure out the lye.
    3. Slowly pour the lye into the water while stirring continuously, ensuring the water is poured into the lye to avoid a violent reaction.
    4. Be cautious of the noxious fumes released during this process and keep your face turned away.
    5. Set aside the lye solution in a well-ventilated area to cool.
  2. Melt the lard:

    Weigh the lard and melt it gently in a saucepan over low heat, taking care not to burn it. Stir occasionally until the lard has completely melted. Remove from heat and set aside.

  3. Prepare fragrance and mold:

    Weigh out your desired essential oils or exfoliants (such as coffee or cedar wood), if using. Prepare your soap mold for pouring the soap batter. You can line it with parchment paper or use a silicone mold.

  4. Combine lye and oils:

    Allow the lye solution and melted lard to cool separately until they reach a temperature range of approximately 90°F (32°C) to 120°F (54°C). Slowly pour the lye solution into the melted lard in a thin stream, while stirring continuously.

  5. Achieve trace:

    Blend the mixture using a stick blender until it reaches the “trace” stage. Trace is the point at which the soap batter thickens and leaves a visible trace on the surface when drizzled from the blender or a spoon. It indicates that the oils and lye have emulsified.

  6. Pour and set:

    Pour the soap batter into the prepared mold. Cover the mold with a lid or cardboard, and then wrap it in a towel. Allow the soap to set undisturbed in a warm area for 24 hours.
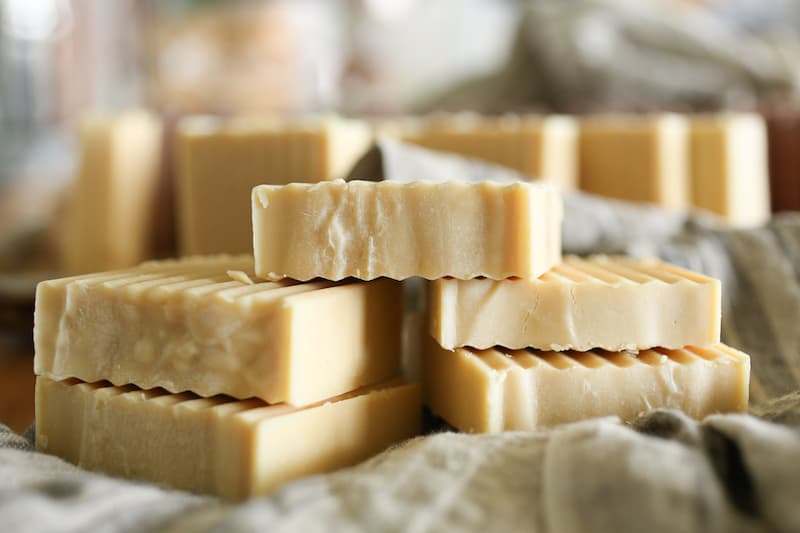
  7. Cut and cure:

    After 24 hours, remove the soap from the mold. It should be firm enough to cut into bars. Cut the soap into desired bar sizes and place them in a dry, well-ventilated area to cure for approximately one month. Turn the bars occasionally during the curing process.

Congratulations! You have unlocked the art of crafting homemade soap using the cold-processed lard method.

Advertisement:

By following these simple steps, you can create a batch of 9-12 bars of soap at virtually no cost. From rendering your own lard to making lye from wood ash, this recipe offers a truly self-sustainable approach to soapmaking. Embrace the freedom of creating your own soap, customized with essential oils or exfoliants of your choice.

Advertisement:

As your soap cures, anticipate the satisfaction of using a truly homemade product that nourishes and cleanses your skin. Join the community of soap makers and revel in the joy of crafting one of life’s everyday essentials.

Advertisement:

Thanks for your SHARES!

Advertisement:

You May Also Like

Add a comment

Latest posts

Jamie Oliver’s Creamy Mediterranean Vanilla Cheesecake: A Dreamy, Impressive Dessert That’s Dead Easy to Make

baking with honey basic roll cake delicious dessert recipe easy baking recipe homemade cake recipe honey Swiss roll moist Swiss roll soft sheet cake Swiss roll cake

Delicious Homemade Swiss Roll Cake Recipe with Honey – Easy and Moist!

Appetizer Awesome Blossom Dipping Sauce Crispy Onion Rings Dipping sauce Homemade Appetizers Homemade Onion Rings Make-Ahead Onion Rings. Onion Ring Recipe Onion Ring Serving Ideas restaurant-style side dish

Crispy Onion Rings with Dipping Sauce

butternut squash soup Common Questions. cutting butternut squash easy variations fall recipes ingredients make-ahead Perfect roasted butternut squash roasted vegetables roasting method selecting and storing butternut squash simple roasted butternut squash recipe tips Tutorial ways to serve

Roasted Butternut Squash Recipe

Active Dry Yeast Bread Flour Cloverleaf Rolls Dinner Rolls holiday make-ahead Milk Bread Recipe tips

The Softest Cloverleaf Dinner Rolls

Balsamic Vinegar Basil Burrata Cheese Caprese Salad Heirloom Tomatoes olive oil Recipe Summer Salad Tomato Burrata Salad

Tomato Burrata Salad Recipe

5-Seed Bread Artisan Bread Bread Flour Bread Making Bread Recipe Crusty Loaf Dutch Oven Baking Dutch Oven Bread easy baking Homemade Bread No-Knead Bread Sandwich Recipes Toasted Seeds

Easy Dutch Oven Bread Recipe

baking soda buttermilk Common Questions. easy recipe freezing holiday favorite. Irish Soda Bread no kneading quick bread raisins recipe instructions tips

Irish Soda Bread Recipe

Appetizer Bacon Ranch Cheese Ball Bagels Crackers Creamy Crostini Easy Holidays Homemade make-ahead olives party Pita chips pretzels Recipe Roasted Peppers Salami serving ideas storage tips Tortilla Chips Valentina’s Corner Vegetables

Easy Classic Cheese Ball Recipe

Avocado Corn Salad BBQ boiled corn boiling time cooking method Corn Chowder Corn Guacamole corn on the cob corn recipe culinary delight juicy leftover corn peak season Pro serving tip Sugar summer side dish sweet corn tender wooden skewers

Boiled Corn on the Cob Recipe